在Spring Boot中保存前端上传的图片可以通过以下步骤实现:
1. 添加依赖
确保在pom.xml中已包含Spring Web依赖:
<dependency>
<groupId>org.springframework.boot</groupId>
<artifactId>spring-boot-starter-web</artifactId>
</dependency>
2. 配置文件上传限制
在application.properties中设置文件大小限制:
spring.servlet.multipart.max-file-size=10MB
spring.servlet.multipart.max-request-size=10MB
#====自定义变量======
#文件上传地址
file.upload.dir=uploads/
3. 创建文件上传控制器
package com.hirain.mall.controller
;
import com.hirain.mall.common.ApiRestResponse
;
import jakarta.servlet.http.HttpServletRequest
;
import org.springframework.beans.factory.annotation.Value
;
import org.springframework.web.bind.annotation.PostMapping
;
import org.springframework.web.bind.annotation.RequestMapping
;
import org.springframework.web.bind.annotation.RequestParam
;
import org.springframework.web.bind.annotation.RestController
;
import org.springframework.web.multipart.MultipartFile
;
import java.nio.file.Files
;
import java.nio.file.Path
;
import java.nio.file.Paths
;
import java.util.Map
;
import java.util.UUID
;
@RestController
@RequestMapping
("/images"
)
public
class ImageController {
@Value
("${file.upload.dir}"
) // 从配置文件中读取路径
private String uploadDir;
@PostMapping
("/upload"
)
public ApiRestResponse<
?> uploadImage(
@RequestParam
("image"
) MultipartFile file,
HttpServletRequest request) {
try {
// 创建目录 (如果不存在)
Path uploadPath = Paths.get(uploadDir)
;
if (!Files.exists(uploadPath)
) {
Files.createDirectories(uploadPath)
;
}
// 生成唯一文件名 (避免覆盖)
String originalFileName = file.getOriginalFilename(
)
;
String fileExt = originalFileName.substring(originalFileName.lastIndexOf("."
)
)
;
String newFileName = UUID.randomUUID(
) + fileExt;
// 保存文件
Path targetPath = uploadPath.resolve(newFileName)
;
Files.copy(file.getInputStream(
)
, targetPath)
;
// 生成访问 URL (使用环境信息构建完整URL)
String baseUrl = request.getRequestURL(
).toString(
).replace(request.getRequestURI(
)
, ""
)
;
String imageUrl = baseUrl + "/images/" + newFileName;
return ApiRestResponse.success(Map.of(
"filename"
, newFileName,
"url"
, imageUrl//完成静态资源映射配置后,通过浏览器直接访问该地址即可访问图片
)
)
;
}
catch (Exception e) {
return ApiRestResponse.error(500
,"上传失败: " + e.getMessage(
)
)
;
}
}
}
4.静态资源映射配置类WebConfig
package com.hirain.mall.config
;
import org.springframework.beans.factory.annotation.Value
;
import org.springframework.context.annotation.Configuration
;
import org.springframework.web.servlet.config.annotation.ResourceHandlerRegistry
;
import org.springframework.web.servlet.config.annotation.WebMvcConfigurer
;
import java.io.File
;
@Configuration
public
class WebConfig
implements WebMvcConfigurer {
@Value
("${file.upload.dir}"
)
private String uploadDir;
@Override
public
void addResourceHandlers(ResourceHandlerRegistry registry) {
// 将真实的上传目录映射为虚拟路径
registry.addResourceHandler("/images/**"
)
.addResourceLocations("file:" + uploadDir + File.separator)
;
}
}
5. 前端调用示例(HTML)
<input type="file" id="imageInput"><button onclick="uploadImage(
)">上传</button>
<script>asyncfunction uploadImage() {const fileInput = document.getElementById('imageInput');const formData =new FormData();formData.append('image', fileInput.files[0]);const response =await fetch('http://localhost:8080/images/upload', {method: 'POST',body: formData});const result =await response.text();console.log(result);}
</script>
6. postman调用示例
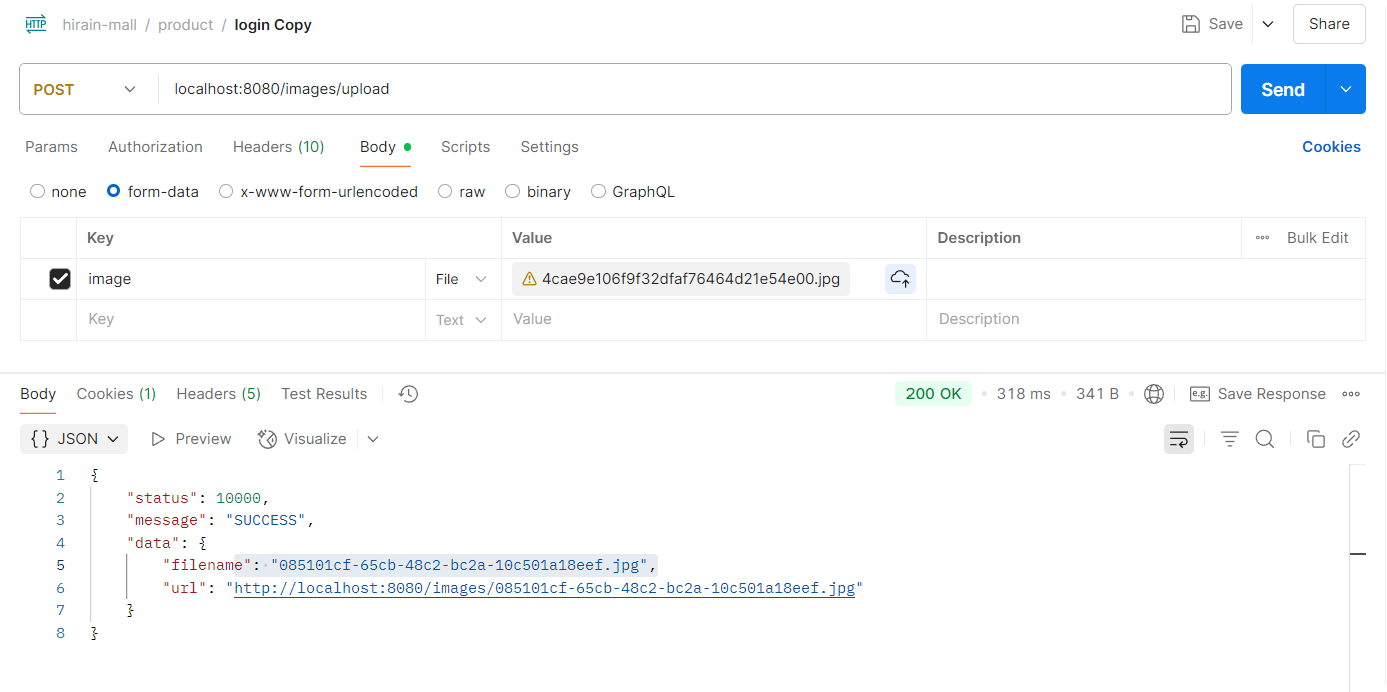
关键点说明:
文件保存路径:
- 示例中使用相对路径
uploads/(项目根目录下) - 生产环境建议使用绝对路径(如
/var/www/uploads/)
- 示例中使用相对路径
文件名处理:
- 使用时间戳前缀确保唯一性
- 保留原始文件名后缀(通过
file.getOriginalFilename()获取)
异常处理:
- 捕获
IOException处理文件操作异常 - 返回错误信息给前端
- 捕获
进阶优化建议:
添加文件类型校验:
if (!file.getContentType( ).startsWith("image/" ) ) { return "仅支持图片文件" ; }添加安全限制:
- 限制文件扩展名(jpg, png等)
- 使用病毒扫描工具扫描上传文件
云存储方案:
- 生产环境建议使用云存储(AWS S3, 阿里云OSS等)
- 示例代码替换为云存储SDK的上传逻辑
处理流程示意图:
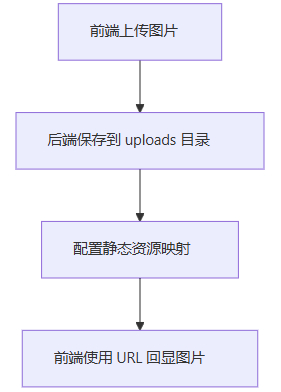
其中,前端上传图片后,后端保存在本地的流程如下:
前端 → 发送Multipart请求 → Spring控制器 → 验证文件 → 生成唯一文件名 → 保存到本地 → 返回结果根据实际需求选择本地存储或云存储方案,并注意做好文件类型校验和安全防护措施。