OpenMP并行化编程指南
核心思想:基于线程的共享内存并行
OpenMP 的核心思想是 “ Fork-Join ” 并行模型。程序开始时是一个单线程(主线程),在遇到需要并行计算的区域时,主线程派生出多个工作线程来共同完成任务。当并行区域内的代码执行完毕后,这些工作线程同步并退出,最后只剩下主线程继续执行后续的串行代码。
一、并行方式
OpenMP 采用了一种 “指令制导” 的并行方式,这意味着开发者不需要手动创建和管理线程,而是通过向编译器添加特殊的预处理指令(在 C/C++ 中是 #pragma)来指明哪些代码应该被并行执行。
这种方式的主要特点包括:
- 增量并行化: 你可以从一个完全串行的程序开始,逐步地为其热点循环或代码段添加 OpenMP 指令,而不需要重写整个程序。
- 混合编程: OpenMP 通常与 MPI 结合使用,形成混合编程模型。即在节点间使用 MPI 进行分布式内存并行,在节点内使用 OpenMP 进行共享内存并行。
- 数据环境控制: 通过子句(如
private,shared,reduction)可以精细地控制变量在线程间的共享或私有属性。
二、并行结构(核心构造)
OpenMP 的并行结构主要由以下几类指令构成:
1. 并行区域构造 (parallel)
这是最基础的构造,用于创建一个并行区域。
-
指令:
#pragma omp parallel -
功能: 遇到此指令后,系统会创建一组线程(默认为逻辑核心数),每个线程都会执行该结构化块内的代码。
-
示例:
#pragma omp parallel
{printf("Hello from thread %d\n", omp_get_thread_num());
}
2. 工作共享构造
这些构造必须嵌套在 parallel 区域内,用于将任务分配给各个线程。它们不会创建新线程,而是将工作分配给已存在的线程团队。
-
循环构造 (
for)-
指令:
#pragma omp for -
功能: 将一个 for 循环的迭代划分给多个线程执行。会自动处理循环迭代的分配和数据私有化等问题。
-
示例:
#pragma omp parallel for
for (int i = 0; i < N; i++) {c[i] = a[i] + b[i];
}
(注意:
parallel for是parallel和for的合并简写形式)
-
-
分段构造 (
sections)-
指令:
#pragma omp sections -
功能: 将不同的、独立的代码段(
section)分配给不同的线程执行,适用于任务并行。 -
示例:
#pragma omp parallel sections
{#pragma omp section{ functionA(); }#pragma omp section{ functionB(); }
}
-
-
单代码块构造 (
single/master)single: 后续的结构化代码块仅由线程组中的某一个线程(不一定是主线程)执行一次。master: 后续的结构化代码块仅由主线程执行。
3. 同步构造
用于协调线程间的执行顺序,防止数据竞争。
- 临界区 (
critical): 确保同一时间只有一个线程能进入该代码块。 - 原子操作 (
atomic): 用于保证对某个变量的简单读写、更新操作是原子的,比critical效率更高。 - 屏障 (
barrier): 所有线程执行到此处必须等待,直到所有线程都到达后,才能继续向下执行。在for,sections等构造结束时隐含了屏障。 - 栅栏 (
flush): 确保线程对共享变量的修改对其他线程可见。
4. 任务构造 (task)
- 指令:
#pragma omp task - 功能: 这是 OpenMP 3.0 引入的强大特性,用于处理不规则、动态的并行模式(如递归、链表遍历)。每个
task指令会定义一个显式任务,由线程池中的线程异步执行。它比传统的循环迭代划分更灵活。
5. 数据环境子句
这些不是独立的构造,而是附加在以上构造上的子句,用于控制变量的作用域。
private(list): 为每个线程创建变量的私有副本。shared(list): 变量在线程间共享(默认行为)。reduction(operator:list): 对变量进行规约操作(如求和+、求最大值max)。firstprivate(list): 类似private,但会用主线程中的值初始化私有副本。
三、OpenMp使用指南
1. 如何在Visual Studio 2022 中开启OpenMp?
首先,在Visual Studio 2022 中,是已经有OpenMp的相关环境的,但是我们创建新项目之后,是默认关闭的。我们只需要勾选打开即可。
导航栏 --> 项目 --> xxx属性(P) --> C/C++ --> 语言 --> 勾选OpenMP支持选项为(是(/openmp)) --> 确定返回


2. 如何在VSCode中使用OpenMP?
在这里,默认大家已经按照网上的一些教程安装配置好了C/C++的基础编译环境,可以通过gcc/g++运行一些基础的C/C++代码,例如:
#include <stdio.h>int main()
{printf("Hello chenxing.\n");return 0;
}
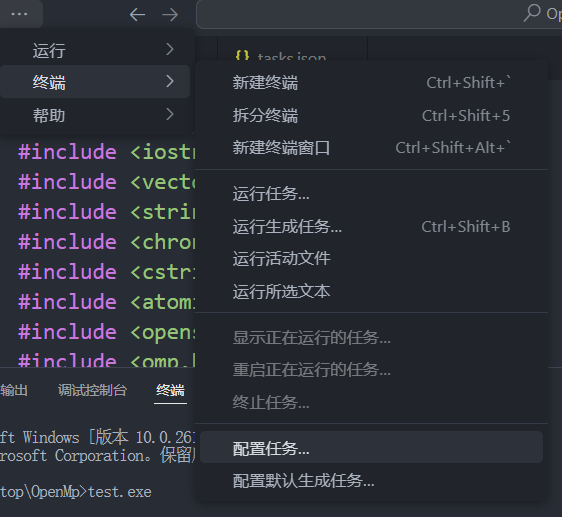
在此基础上,我们其实已经拥有了相应的OpenMP环境了,我们只需要将其打开即可。首先在VSCode中终端 --> 配置任务 --> 输入tasks.json --> 选择首项。完成上述操作时候,会在我们当前文件夹下生成.vscode\tasks.json,我们修改其中的内容如下:
{"version": "2.0.0","tasks": [{"label": "build (cl)","type": "shell","command": "cl","args": ["/EHsc","/openmp","/O2","${file}","/Fe:${fileDirname}\\${fileBasenameNoExtension}.exe"],"group": {"kind": "build","isDefault": true},"presentation": {"reveal": "always"},"problemMatcher": ["$msCompile"]}]
}
按照上述操作之后,我们可以先写好我们的并行化编程代码,之后打开当前文件夹下的终端进行g++编译:g++ -fopenmp test.cpp -o test.exe,其中test.cpp为我们写的C++文件(C语言为.c),test.exe是我们希望生成的可执行程序的名称,可以自行定义。之后会在我们的文件夹下生成相应的.exe文件,我们在终端输入test.exe即可运行。可以直接Run Code的教程,但是我并没有复现成功,这里只能给大家通过tasks.json和终端命令进行并行化编程、编译运行的教程。同时推荐大家不论是开发或是实验,都可以采用Vosual Studio进行编程,更适合下断点和调试。
3. 如何导入使用OpenMP?
如果我们需要使用OpenMP,我们只需要导入omp.h头文件即可。因为OpenMP为我们提供的是增量型编程,因此在使用时,只需要在我们需要进行并行化的地方添加相应的控制语句即可。例如:
# include<iostream>
# include<omp.h>using namespace std;int main()
{omp_set_num_threads(4); // 设置线程数为4
#pragma omp parallel // 标记一段代码将被多个线程并行执行的指令cout << "Hello OpenMp, I'm threadNo." << omp_get_thread_num() << endl;return 0;
}

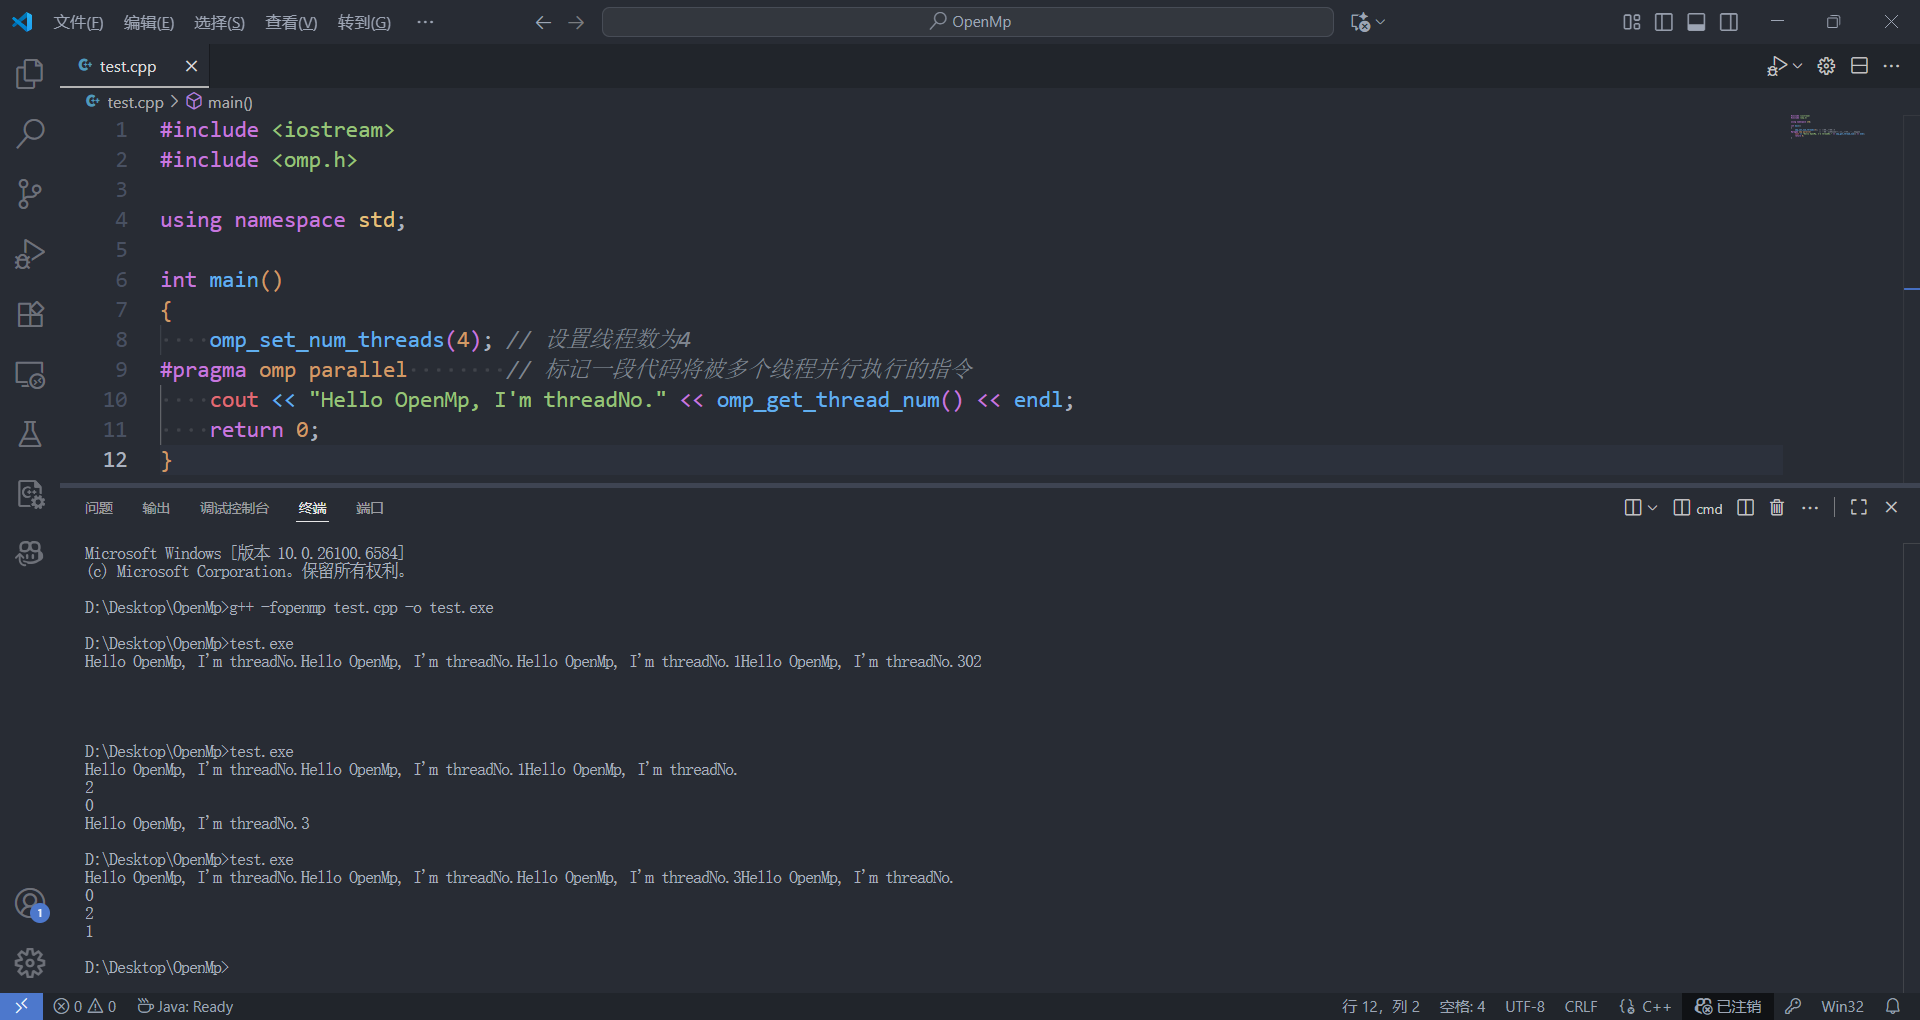
注意:并行化的线程的速度,每一个线程的速度是不可控的,并且我们没有进行同步构造,所以大概率我们每次运行程序所得到的结果都是不一样的,甚至可能出现语句中断的情况,这是并行化编程的正常现象。
4. OpenMP并行化提高效率的实例与踩坑
这里我们使用第三届“熵密杯”密码安全挑战赛的初始赛题1来进行并行化爆破flag,尝试查看并行化的速度提升效果。(这里其他部分没有做过多的优化,可能并没有完全体现出OpenMP并行化编程的优势所在😅,爆破空间为\(4 ^ 16 = 2 ^ 32\)
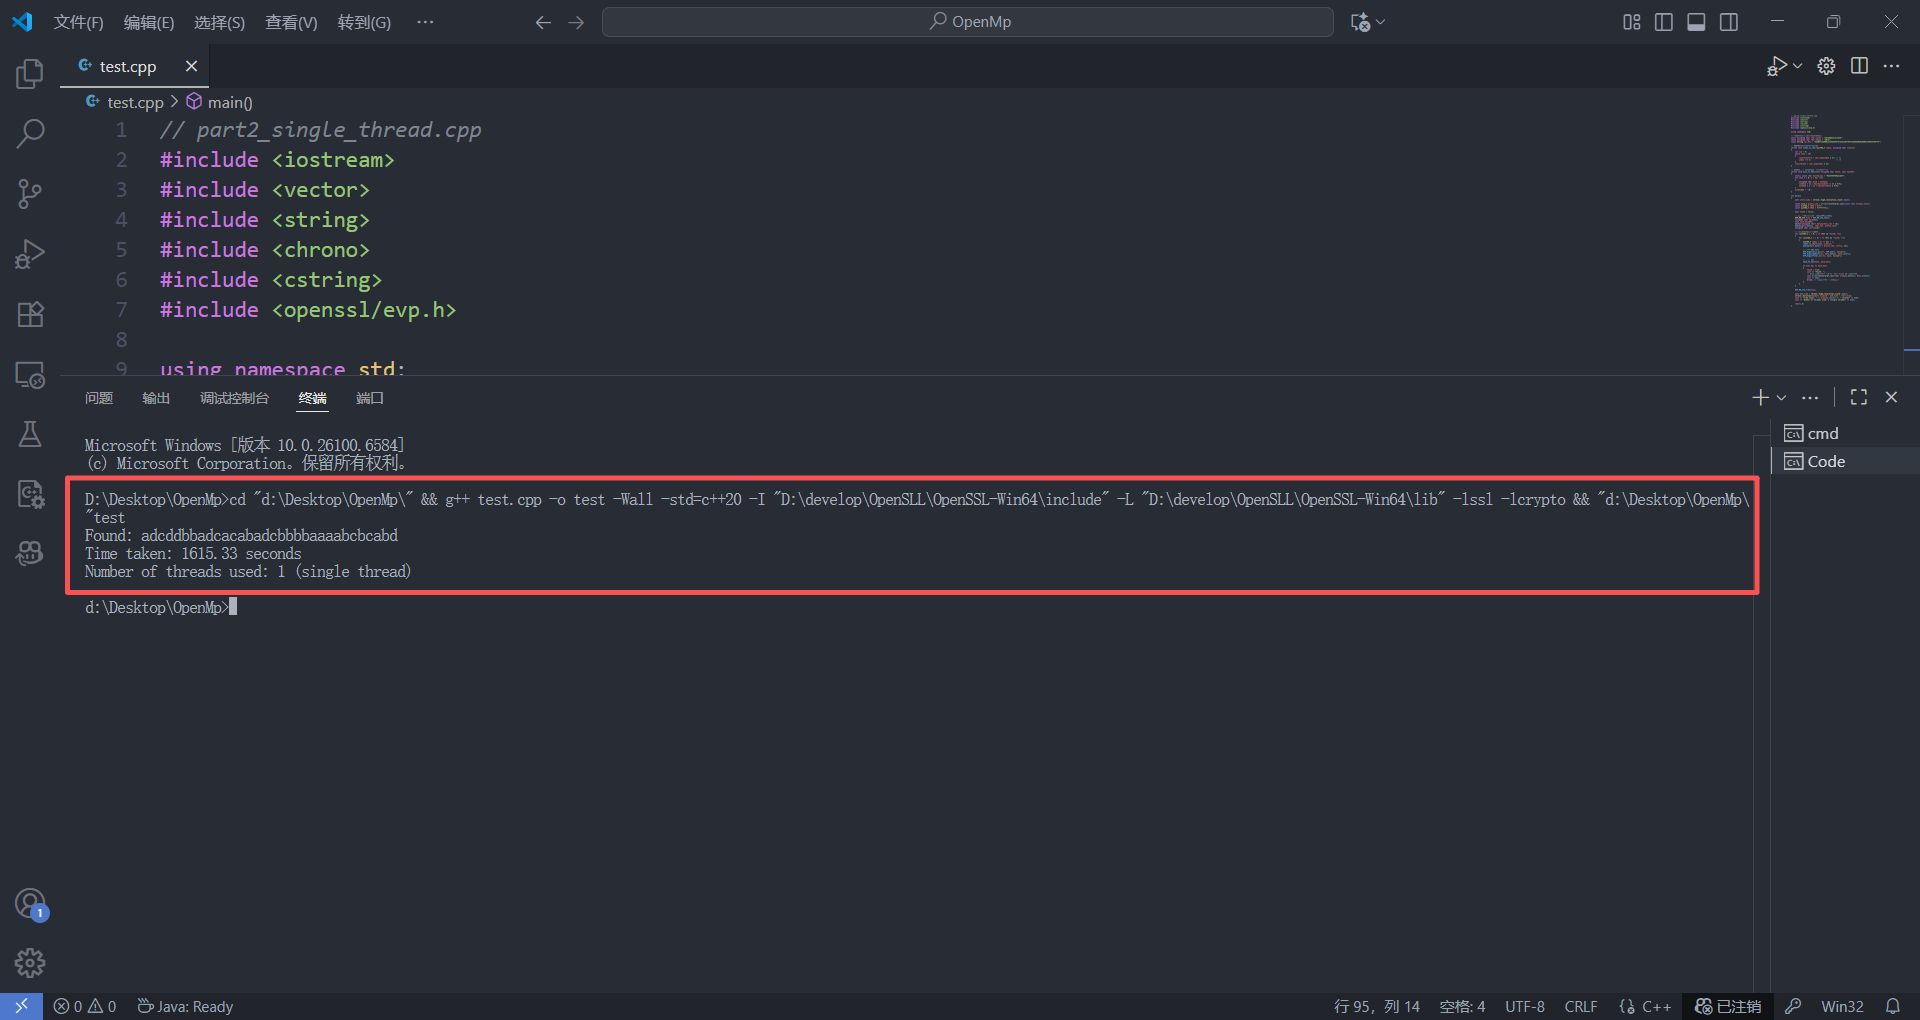
// part2 -- 单线程测试
#include <iostream>
#include <vector>
#include <string>
#include <chrono>
#include <cstring>
#include <openssl/evp.h>using namespace std;const unsigned char char_set[] = "adcddbbadcacabad";
const unsigned char char_map[] = "abcd";
const string tar_hex = "aab05fca300811223b3b957bfe33130770fb7a6b55b030a5809c559344f66f79";// index to char
inline void index_to_char(uint64_t index, unsigned char *result)
{int len = 0;while (len < 15){result[len++] = char_map[index & 3];index >>= 2;}result[len] = char_map[index & 3];
}// to hex
inline void hash_to_hex(const unsigned char *hash, char *out64)
{static const char hexchars[] = "0123456789abcdef";for (int k = 0; k < 32; ++k){unsigned char byte = hash[k];out64[2 * k] = hexchars[(byte >> 4) & 0xF];out64[2 * k + 1] = hexchars[byte & 0xF];}out64[64] = '\0';
}int main()
{auto start_time = chrono::high_resolution_clock::now();const size_t prefix_len = strlen(reinterpret_cast<const char *>(char_set));const uint64_t JMAX = 0xff;const uint64_t IMAX = 0xffffffULL;bool found = false;EVP_MD_CTX *ctx = EVP_MD_CTX_new();unsigned char hash[32];char hash_hex[65];vector<unsigned char> data(prefix_len + 16);memcpy(data.data(), char_set, prefix_len);unsigned char suffix[16];for (uint64_t j = 0; j <= JMAX && !found; ++j){for (uint64_t i = 0; i <= IMAX && !found; ++i){uint64_t index = (j << 24) + i;index_to_char(index, suffix);memcpy(data.data() + prefix_len, suffix, 16);// SM3EVP_DigestInit_ex(ctx, EVP_sm3(), nullptr);EVP_DigestUpdate(ctx, data.data(), data.size());EVP_DigestFinal_ex(ctx, hash, nullptr);// to hexhash_to_hex(hash, hash_hex);if (tar_hex == hash_hex){found = true;cout << "Found: ";cout.write(reinterpret_cast<char *>(data.data()), data.size());cout << endl;break;}}}EVP_MD_CTX_free(ctx);auto end_time = chrono::high_resolution_clock::now();chrono::duration<double> elapsed = end_time - start_time;cout << "Time taken: " << elapsed.count() << " seconds" << endl;cout << "Number of threads used: 1 (single thread)" << endl;return 0;
}
/*
Found: adcddbbadcacabadcbbbbaaaabcbcabd
Time taken: 1615.33 seconds
Number of threads used: 1 (single thread)
*/
/*
Found: adcddbbadcacabadcbbbbaaaabcbcabd
Time taken: 1324.53 seconds
Number of threads used: 1 (single thread)
*/

// part2 -- OpenMP测试
#include <iostream>
#include <vector>
#include <string>
#include <chrono>
#include <cstring>
#include <atomic>
#include <openssl/evp.h>
#include <omp.h>using namespace std;static std::atomic<bool> found(false);const unsigned char char_set[] = "adcddbbadcacabad";
const unsigned char char_map[] = "abcd";
const string tar_hex = "aab05fca300811223b3b957bfe33130770fb7a6b55b030a5809c559344f66f79";inline void index_to_char(uint64_t index, unsigned char *result)
{int len = 0;while (len < 15){result[len++] = char_map[index & 3];index >>= 2;                         }result[len] = char_map[index & 3];
}inline void hash_to_hex(const unsigned char *hash, char *out64)
{static const char hexchars[] = "0123456789abcdef";for (int k = 0; k < 32; ++k){unsigned char byte = hash[k];out64[2 * k] = hexchars[(byte >> 4) & 0xF];out64[2 * k + 1] = hexchars[byte & 0xF];}out64[64] = '\0';
}int main()
{auto start_time = chrono::high_resolution_clock::now();const size_t prefix_len = strlen(reinterpret_cast<const char *>(char_set));const uint64_t JMAX = 0xff;const uint64_t IMAX = 0xffffffULL;#pragma omp parallel{EVP_MD_CTX *ctx = EVP_MD_CTX_new();unsigned char hash[32];char hash_hex[65];vector<unsigned char> data(prefix_len + 16);memcpy(data.data(), char_set, prefix_len);unsigned char suffix[16];// collapse(2) 将 j/i 两层循环合并为一个大循环,schedule(dynamic) 动态分配块
#pragma omp for schedule(dynamic, 1) collapse(2)for (uint64_t j = 0; j <= JMAX; ++j){for (uint64_t i = 0; i <= IMAX; ++i){if (found.load(std::memory_order_relaxed))continue;uint64_t index = (j << 24) + i;index_to_char(index, suffix);memcpy(data.data() + prefix_len, suffix, 16);// SM3EVP_DigestInit_ex(ctx, EVP_sm3(), nullptr);EVP_DigestUpdate(ctx, data.data(), data.size());EVP_DigestFinal_ex(ctx, hash, nullptr);// to hexhash_to_hex(hash, hash_hex);if (tar_hex == hash_hex){
#pragma omp critical{if (!found.load(std::memory_order_relaxed)){found.store(true, std::memory_order_release);cout << "Found: ";cout.write(reinterpret_cast<char *>(data.data()), data.size());cout << endl;}}}}}EVP_MD_CTX_free(ctx);} // omp parallelauto end_time = chrono::high_resolution_clock::now();chrono::duration<double> elapsed = end_time - start_time;cout << "Time taken: " << elapsed.count() << " seconds" << endl;cout << "Number of threads used: " << omp_get_max_threads() << endl;return 0;
}
/*
Found: adcddbbadcacabadcbbbbaaaabcbcabd
Time taken: 2691.4 seconds
Number of threads used: 16
*/
/*
Found: adcddbbadcacabadcbbbbaaaabcbcabd
Time taken: 2564.6 seconds
Number of threads used: 16
*/


从这里我们意外地发现了,使用OpenMP开辟16线程并行化优化爆破的运行时间远超于单线程的纯爆破时间,后续分析了一下原因😭😭:
-
if (found.load(std::memory_order_relaxed))continue; /* 原来想的是为了精确统计地时间,当一个线程在所分配的任务中找到`flag`后就退出程序,但是这就造成了每次都会进行`found`的检查,造成了大量的原子操作,大致为256 × 16,777,216 ≈ 43亿次。这远大于普通变量的访问次数。 */ -
#pragma omp for schedule(dynamic, 1) collapse(2) /* 这里原本想的是,让每个线程都动态地调度任务,可以最大化利用CPU的计算能力,但是正是因为频繁地动态调度任务,导致效率反而与期望的相反。同时我还想着尽可能这样地分配任务,让OpenMP的调度进入了内层循环。😂 dynamic 调度需要维护任务队列,有同步开销 chunk=1 太小,导致线程频繁请求新任务 collapse(2) 将两层循环合并,增加了调度复杂性 */ -
这一条是让ai审计代码之后给出的结论:多个线程同时访问不同的内存区域,可能导致缓存颠簸。
接下来是我进行修改之后的代码,我们为了便于统计时间,可以设置一个检查found的阈值,这样既便于我们精确地统计时间,还不会造成过多的额外时间消耗,同时动态调度的任务我们可以静态地在外层分布任务,虽然可能会造成部分线程的闲置,但是这对于频繁地分配任务造成的队列时间冗余而言,好的太多了。
// part2 -- OpenMP测试
#include <iostream>
#include <vector>
#include <string>
#include <chrono>
#include <cstring>
#include <atomic>
#include <openssl/evp.h>
#include <omp.h>using namespace std;static std::atomic<bool> found(false);const unsigned char char_set[] = "adcddbbadcacabad";
const unsigned char char_map[] = "abcd";
const string tar_hex = "aab05fca300811223b3b957bfe33130770fb7a6b55b030a5809c559344f66f79";inline void index_to_char(uint64_t index, unsigned char *result)
{int len = 0;while (len < 15){result[len++] = char_map[index & 3];index >>= 2;                         }result[len] = char_map[index & 3];
}inline void hash_to_hex(const unsigned char *hash, char *out64)
{static const char hexchars[] = "0123456789abcdef";for (int k = 0; k < 32; ++k){unsigned char byte = hash[k];out64[2 * k] = hexchars[(byte >> 4) & 0xF];out64[2 * k + 1] = hexchars[byte & 0xF];}out64[64] = '\0';
}int main()
{auto start_time = chrono::high_resolution_clock::now();const size_t prefix_len = strlen(reinterpret_cast<const char *>(char_set));const uint64_t JMAX = 0xff;const uint64_t IMAX = 0xffffffULL;#pragma omp parallel{EVP_MD_CTX *ctx = EVP_MD_CTX_new();unsigned char hash[32];char hash_hex[65];vector<unsigned char> data(prefix_len + 16);memcpy(data.data(), char_set, prefix_len);unsigned char suffix[16];bool local_found = false;const uint64_t CHECK_INTERVAL = 100000; // 设置检查阈值,便于时间统计精确// 使用静态调度,避免动态调度的开销// nowait 让完成任务的线程不必等待其他线程
#pragma omp for schedule(static) nowaitfor (uint64_t j = 0; j <= JMAX; ++j){if (found.load(std::memory_order_relaxed))continue;for (uint64_t i = 0; i <= IMAX && !local_found; ++i){// 设置阈值定期检查全局flagif (i % CHECK_INTERVAL == 0 && found.load(std::memory_order_relaxed))break;uint64_t index = (j << 24) + i;index_to_char(index, suffix);memcpy(data.data() + prefix_len, suffix, 16);// SM3EVP_DigestInit_ex(ctx, EVP_sm3(), nullptr);EVP_DigestUpdate(ctx, data.data(), data.size());EVP_DigestFinal_ex(ctx, hash, nullptr);// to hexhash_to_hex(hash, hash_hex);if (tar_hex == hash_hex){local_found = true;
#pragma omp critical{if (!found.load(std::memory_order_relaxed)){found.store(true, std::memory_order_relaxed);cout << "Found: ";cout.write(reinterpret_cast<char *>(data.data()), data.size());cout << endl;}}break;}}// if flag returnif (local_found){}}EVP_MD_CTX_free(ctx);}auto end_time = chrono::high_resolution_clock::now();chrono::duration<double> elapsed = end_time - start_time;cout << "Time taken: " << elapsed.count() << " seconds" << endl;cout << "Number of threads used: " << omp_get_max_threads() << endl;return 0;
}
/*
Time taken: 117.072 seconds
Time taken: 88.9278 seconds
Time taken: 104.038 seconds
Time taken: 110.289 seconds
Time taken: 92.0078 seconds
Time taken: 96.1019 seconds
Time taken: 85.9959 seconds
Time taken: 86.0833 seconds
Time taken: 80.7356 seconds
Time taken: 82.2137 seconds
Time taken: 89.8688 seconds
Time taken: 90.1823 seconds
Time taken: 98.9616 seconds
Time taken: 88.2423 seconds
Time taken: 92.3814 seconds
Time taken: 92.4405 seconds
Time taken: 90.3265 seconds
Time taken: 92.5702 seconds
Time taken: 97.0794 seconds
Time taken: 92.4288 seconds
*/
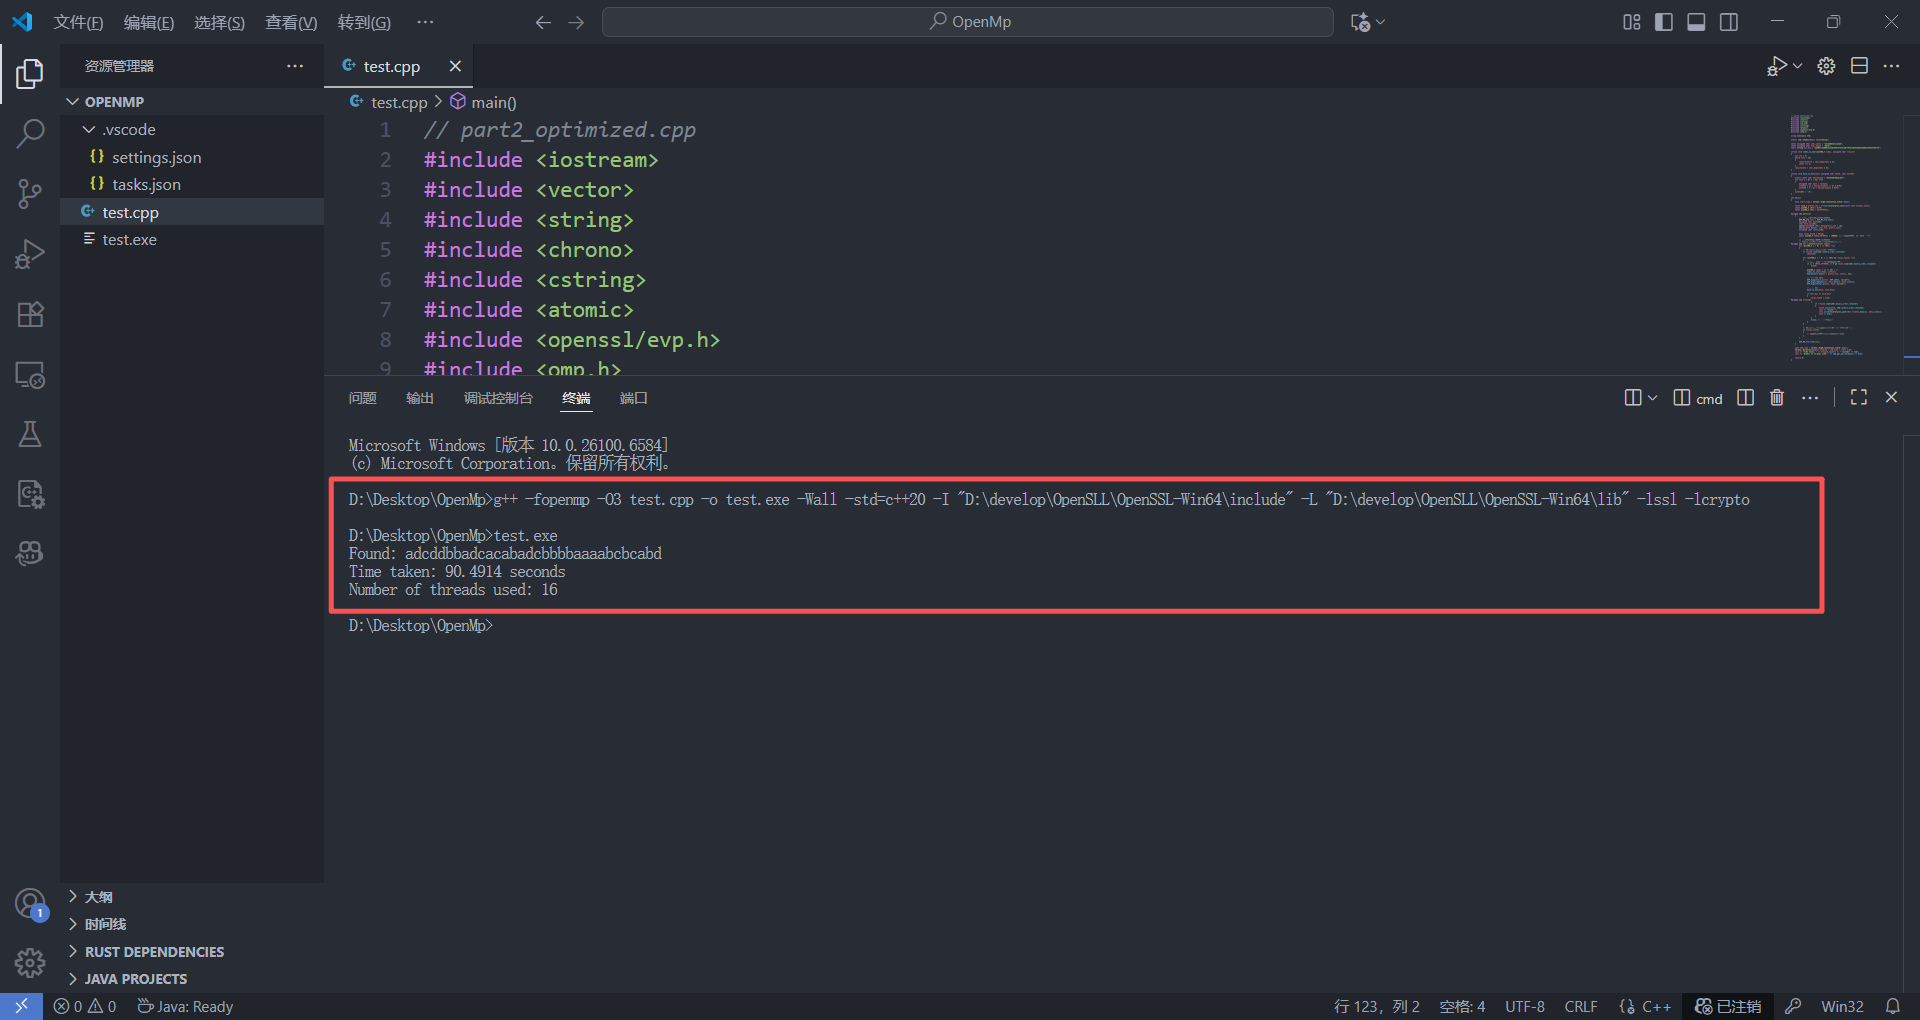

这里我们可以看到OpenMP大大发力了,效果也正是我们想看到的,并行化的处理,16个线程的并行化处理让我们的for下的爆破大大提高。😀原来不知道OpenMP的时候只能手写C++多线程去进行一些数据的爆破,增量并行化的优化模式为我们提供了更优秀的内存控制方式以及并行化处理的代码简洁性。下面的是原来手写的多线程爆破的代码以及效果展示:
// part2
#include <iostream>
#include <vector>
#include <string>
#include <thread>
#include <chrono>
#include <cstring>
#include <openssl/evp.h>
#include <mutex>
#include <condition_variable>
#include <atomic>using namespace std;atomic<bool> found(false);
mutex mtx;
condition_variable cv;const unsigned char char_set[] = "adcddbbadcacabad";
const unsigned char char_map[] = "abcd";
const string tar_hex = "aab05fca300811223b3b957bfe33130770fb7a6b55b030a5809c559344f66f79";
// index to char
void index_to_char(uint64_t index, unsigned char *result)
{int len = 0;while (len < 15){result[len++] = char_map[index % 4];index /= 4;}result[len] = char_map[index];
}// create thread
void thread_worker(uint64_t j)
{const size_t prefix_len = strlen(reinterpret_cast<const char *>(char_set));vector<unsigned char> data(prefix_len + 16);memcpy(data.data(), char_set, prefix_len);unsigned char hash[32];char hash_hex[65];hash_hex[64] = '\0';// 创建哈希上下文(每个线程一个)EVP_MD_CTX *ctx = EVP_MD_CTX_new();for (uint64_t i = 0; i <= 0xffffff; ++i){// if flag breakif (found.load()){break;}const uint64_t index = (j << 24) + i;unsigned char suffix[16];index_to_char(index, suffix);memcpy(data.data() + prefix_len, suffix, 16);// SM3EVP_DigestInit_ex(ctx, EVP_sm3(), nullptr);EVP_DigestUpdate(ctx, data.data(), data.size());EVP_DigestFinal_ex(ctx, hash, nullptr);// to hexfor (int k = 0; k < 32; ++k){snprintf(hash_hex + 2 * k, 3, "%02x", hash[k]);}if (tar_hex == hash_hex){{lock_guard<mutex> lock(mtx);if (!found.load()){found.store(true);cout << "Found: " << string(reinterpret_cast<char *>(data.data()), data.size()) << endl;}}cv.notify_one();break;}}EVP_MD_CTX_free(ctx); // free
}int main()
{auto start_time = chrono::high_resolution_clock::now();vector<thread> threads;threads.reserve(256);// createfor (uint64_t j = 0; j <= 0xff; ++j){threads.emplace_back(thread_worker, j);}{unique_lock<mutex> lock(mtx);cv.wait(lock, []{ return found.load(); });}auto found_time = chrono::high_resolution_clock::now();for (auto &t : threads){if (t.joinable()){t.join();}}auto end_time = chrono::high_resolution_clock::now();chrono::duration<double> found_elapsed = found_time - start_time;chrono::duration<double> total_elapsed = end_time - start_time;cout << "Time to find result: " << found_elapsed.count() << " seconds" << endl;cout << "Total time (including thread cleanup): " << total_elapsed.count() << " seconds" << endl;cout << "Number of threads used: " << threads.size() << endl;return 0;
}
/*
Found: adcddbbadcacabadcbbbbaaaabcbcabd
Time to find result: 516.649 seconds
Total time (including thread cleanup): 516.654 seconds
Number of threads used: 256
*/

这里不难看出,没学并行化编程之前我手写的多线程爆破程序效率并不如OpenMP,后续也进行了分析改进,我开辟了256个线程,虽然我想着最大化利用CPU的计算能力,尽量多开线程去增加并行化编程优化的程度,但是在进程申请的过程中会消耗大量的资源,同时为了保证数据的准确性,频繁地调用了线程锁should_terminate()。最重要的是我在每次迭代都创建和销毁EVP_MD_CTX,造成了大量的资源浪费😀😀。总结而言就是,线程并非创建的越多越好,合适的线程数+高效的任务分配才是关键。下面是由前面OpenMP更新优化的思路修改之后的代码进行测试:
// part2
#include <iostream>
#include <vector>
#include <string>
#include <thread>
#include <chrono>
#include <cstring>
#include <openssl/evp.h>
#include <mutex>
#include <condition_variable>
#include <atomic>using namespace std;atomic<bool> found(false);
mutex mtx;
condition_variable cv;const unsigned char char_set[] = "adcddbbadcacabad";
const unsigned char char_map[] = "abcd";
const string tar_hex = "aab05fca300811223b3b957bfe33130770fb7a6b55b030a5809c559344f66f79";
// index to char
inline void index_to_char(uint64_t index, unsigned char *result)
{int len = 0;while (len < 15){result[len++] = char_map[index & 3]; // 用位运算替代取模index >>= 2;                         // 用移位替代除法}result[len] = char_map[index & 3];
}// to hex
inline void hash_to_hex(const unsigned char *hash, char *out64)
{static const char hexchars[] = "0123456789abcdef";for (int k = 0; k < 32; ++k){unsigned char byte = hash[k];out64[2 * k] = hexchars[(byte >> 4) & 0xF];out64[2 * k + 1] = hexchars[byte & 0xF];}out64[64] = '\0';
}void thread_worker(uint64_t start_j, uint64_t end_j)
{const size_t prefix_len = strlen(reinterpret_cast<const char *>(char_set));vector<unsigned char> data(prefix_len + 16);memcpy(data.data(), char_set, prefix_len);unsigned char hash[32];char hash_hex[65];unsigned char suffix[16];EVP_MD_CTX *ctx = EVP_MD_CTX_new();// 设置阈值,减少原子操作次数const uint64_t CHECK_INTERVAL = 100000;for (uint64_t j = start_j; j < end_j && !found.load(memory_order_relaxed); ++j){for (uint64_t i = 0; i <= 0xffffff && !found.load(memory_order_relaxed); ++i){if (i % CHECK_INTERVAL == 0 && found.load(memory_order_relaxed))break;const uint64_t index = (j << 24) + i;index_to_char(index, suffix);memcpy(data.data() + prefix_len, suffix, 16);// SM3EVP_DigestInit_ex(ctx, EVP_sm3(), nullptr);EVP_DigestUpdate(ctx, data.data(), data.size());EVP_DigestFinal_ex(ctx, hash, nullptr);// to hexhash_to_hex(hash, hash_hex);if (tar_hex == hash_hex){lock_guard<mutex> lock(mtx);if (!found.load(memory_order_relaxed)){found.store(true, memory_order_relaxed);cout << "Found: " << string(reinterpret_cast<char *>(data.data()), data.size()) << endl;cv.notify_one();}break;}}}EVP_MD_CTX_free(ctx);
}int main()
{auto start_time = chrono::high_resolution_clock::now();// 由OpenMP知道本人计算机硬件并发数的16const unsigned int num_threads = thread::hardware_concurrency();cout << "Using " << num_threads << " threads" << endl;vector<thread> threads;threads.reserve(num_threads);const uint64_t total_j = 256;const uint64_t j_per_thread = (total_j + num_threads - 1) / num_threads;for (unsigned int t = 0; t < num_threads; ++t){uint64_t start_j = t * j_per_thread;uint64_t end_j = min(start_j + j_per_thread, total_j);if (start_j < total_j){threads.emplace_back(thread_worker, start_j, end_j);}}{unique_lock<mutex> lock(mtx);cv.wait(lock, []{ return found.load(); });}auto found_time = chrono::high_resolution_clock::now();for (auto &t : threads){if (t.joinable()){t.join();}}auto end_time = chrono::high_resolution_clock::now();chrono::duration<double> time_to_find = found_time - start_time;chrono::duration<double> total_time = end_time - start_time;cout << "Time to find result: " << time_to_find.count() << " seconds" << endl;cout << "Total execution time: " << total_time.count() << " seconds" << endl;return 0;
}
/*
Time to find result: 96.4681 seconds
Time to find result: 82.0618 seconds
Time to find result: 88.2 seconds
Time to find result: 85.3782 seconds
Time to find result: 92.9309 seconds
Time to find result: 93.6169 seconds
Time to find result: 85.6775 seconds
Time to find result: 85.7225 seconds
Time to find result: 94.4853 seconds
Time to find result: 90.1312 seconds
Time to find result: 93.0423 seconds
Time to find result: 80.0173 seconds
Time to find result: 84.7286 seconds
Time to find result: 82.3247 seconds
Time to find result: 85.0477 seconds
Time to find result: 90.3242 seconds
Time to find result: 92.4847 seconds
Time to find result: 93.3593 seconds
Time to find result: 89.5249 seconds
Time to find result: 77.6478 seconds
*/


这里我发现自己写的线程与使用OpenMP的爆破时间比较接近,再加上运行时间并不是很长,所以就每个都多测试几次,计算运行时间的平均值进行比较。这里发现针对于该任务,自己手写的多线程并行化程序效果甚至要比OpenMP爆破速度更快一些。这一路测试下来,我们发现并行化编程并非只是运行一下结果,比较一下时间就能比较哪一种并行化方式更优的。同时,针对于并行化编程,我们要明白:
- 错误地使用多线程;
- 贪图局部的最优化而没有考虑一些原子性的计算操作造成的资源损耗;
- 内层循环内加入不必要的操作或线程维护的操作;
- 不考虑自身计算机的能力,一味地开辟线程......
这些都会使我们的并行化编程效率降低,甚至有可能比串行化运行都要低。
四、 写在最后
这篇笔记记录了本人在《密码工程》课程中使用的OpenMP并行化优化编程的学习过程。过程中不论是配置环境还是计算机的并行化编程,都学到了很多知识,积累了不少经验。在这里声明一下,我们判断一个算法或者说是评判一个问题的优劣,并不能简单地通过运行时间判断,因为我们运行程序得到结果的时间依赖于很多因素,例如当前计算机的CPU利用率,内存使用情况,甚至适配器温度......这个问题在数据结构算法实验中也遇到过,我们能做的就是尽量地控制变量,与此同时可以通过增大数据量的方法来放大算法之间的差别、通过多次运行程序并计算平均值的方式使我们的实际结果更加接近于理论设想。如果大家觉得这种通过运行时间的方式去评判优劣的方式不科学,可以更严格地控制CPU、环境变量、数据量来进行性能的比较。但是针对于相差比较大的,比如1600s --> 100s这样的结果,得出并行化编程在非严格串行要求(流密码)下的运行速度的优势是毋庸置疑的。
这篇笔记用来帮助大家配置OpenMP环境问题,入门学习OpenMP编程以及简单理解并行化编程的性能优化。因为开发能力有限,针对于笔记中的最后版本的OpenMP程序以及我写的多线程程序可能仍旧存在可以优化的地方。同时,针对于OpenMP的理解,多线程优化的优点和前面几个程序的编程问题以及前面陈述OpenMP添加后运行时间反而增长的原因可能存在理解偏差,如果读者师傅有别的见解或优化策略,欢迎各位师傅交流指正。